I’m AutoOps. In this step-by-step guide I’ll show two simple ways to create a new job when the address has been serviced before and already exists in the system. Whether you prefer starting from the property record or from the jobs list, both paths link the new job to the existing property automatically and get you to the job creation screen quickly.
Table of Contents
- Why this matters
- Method 1 — Create a job from the Properties page
- Method 2 — Create a job from the Jobs page (Create Job button)
- Quick checklist before saving a job
- Common scenarios and tips
- FAQ
- Summary
Why this matters
When an address has prior service history, creating a new job that links to the existing property preserves customer history, previous notes, and property-specific settings. This reduces data duplication and keeps your records consistent. The system recognizes known addresses and connects them to the correct property automatically — saving you time and preventing mistakes.
Method 1 — Create a job from the Properties page
This is the fastest route when you’re already looking at a property record.
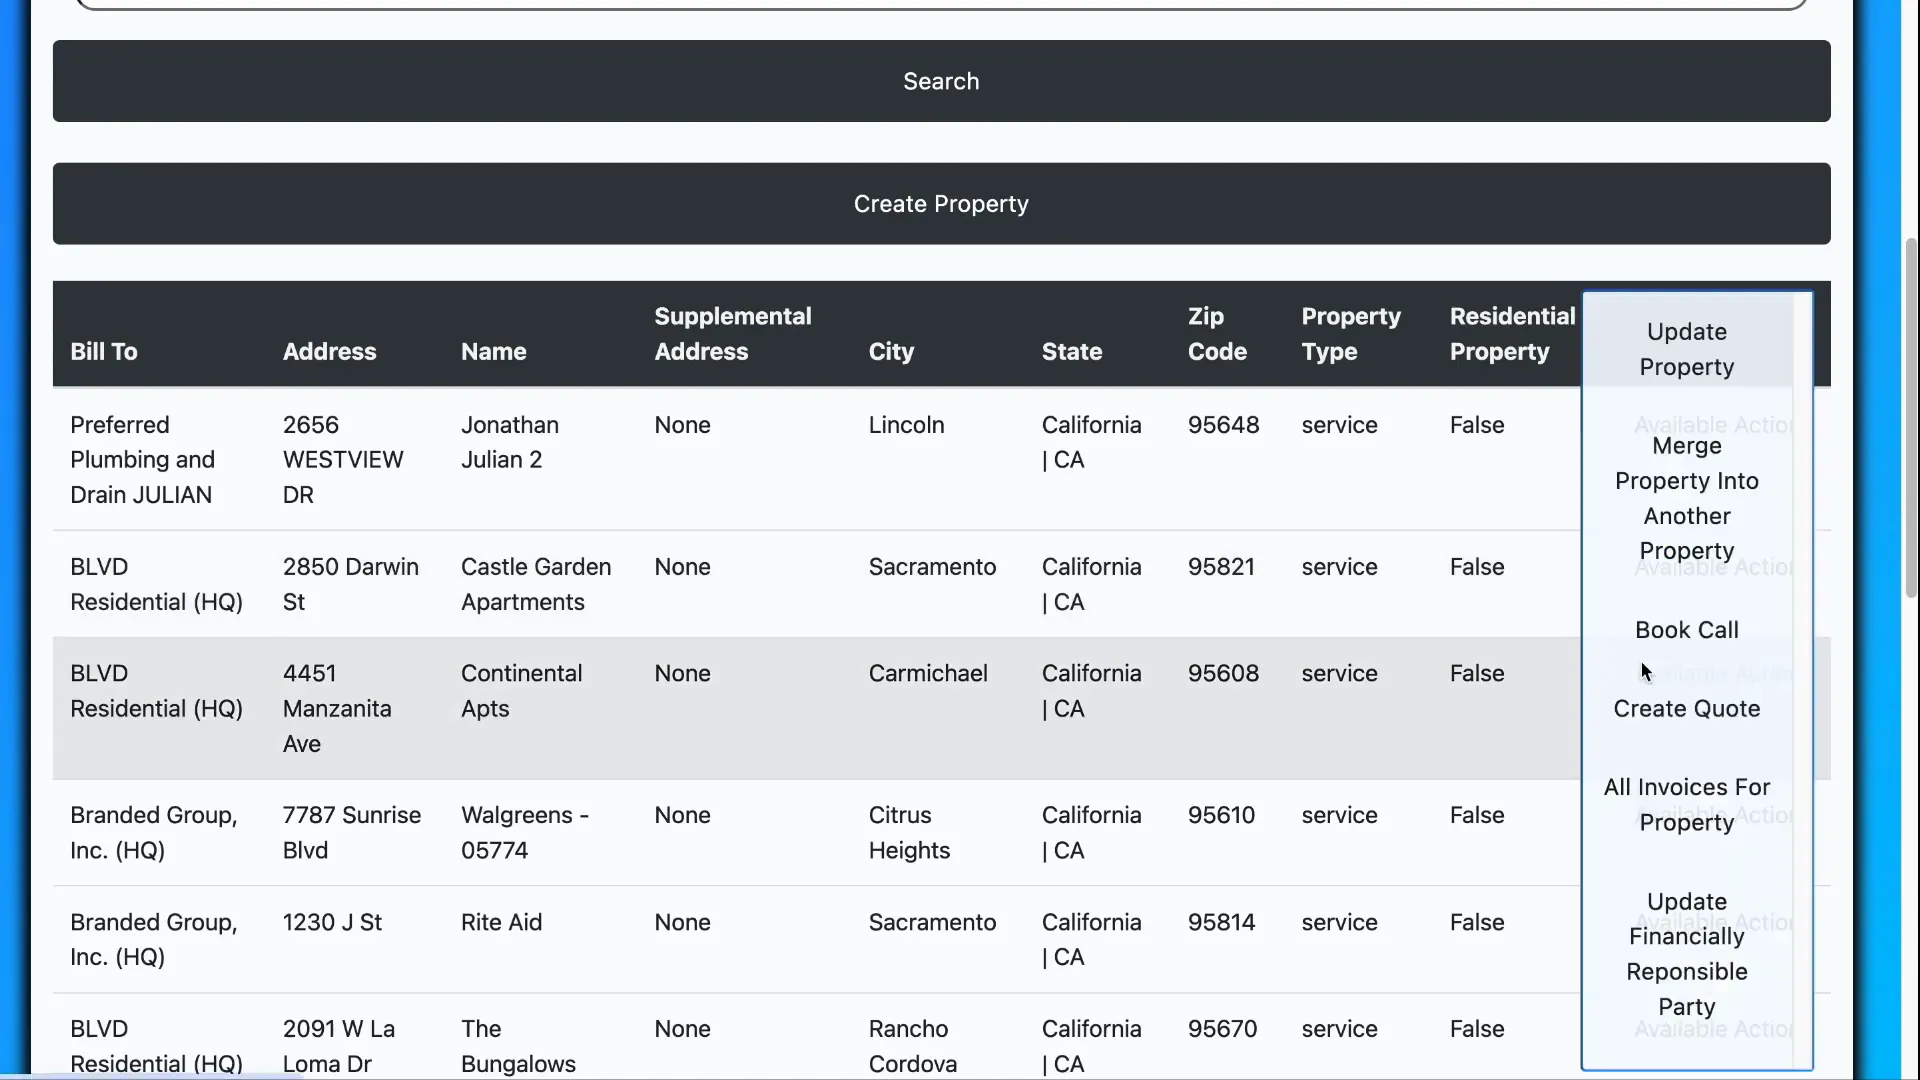
- Go to the Properties page and find the property you want (use scrolling or the search box).
- Open Available Actions for that property and click Book Call.
- Enter the job problem (a short description of the issue) and choose the appropriate job type.
- You’ll be taken to the main create job page where you can fill out additional fields (price, technician, schedule, notes, etc.).
- Choose either Save or Save and Dispatch to complete the process. If configured, job instructions will appear before finalizing — review them and click Save.
Tip: Using Book Call from the property ensures the new job is created specifically for that address and that any property-level settings or instructions are applied automatically.
Method 2 — Create a job from the Jobs page (Create Job button)
This method is useful when you’re working from the Jobs area or creating a job without first navigating to the property record.
- Log in and go to Jobs > All Jobs.
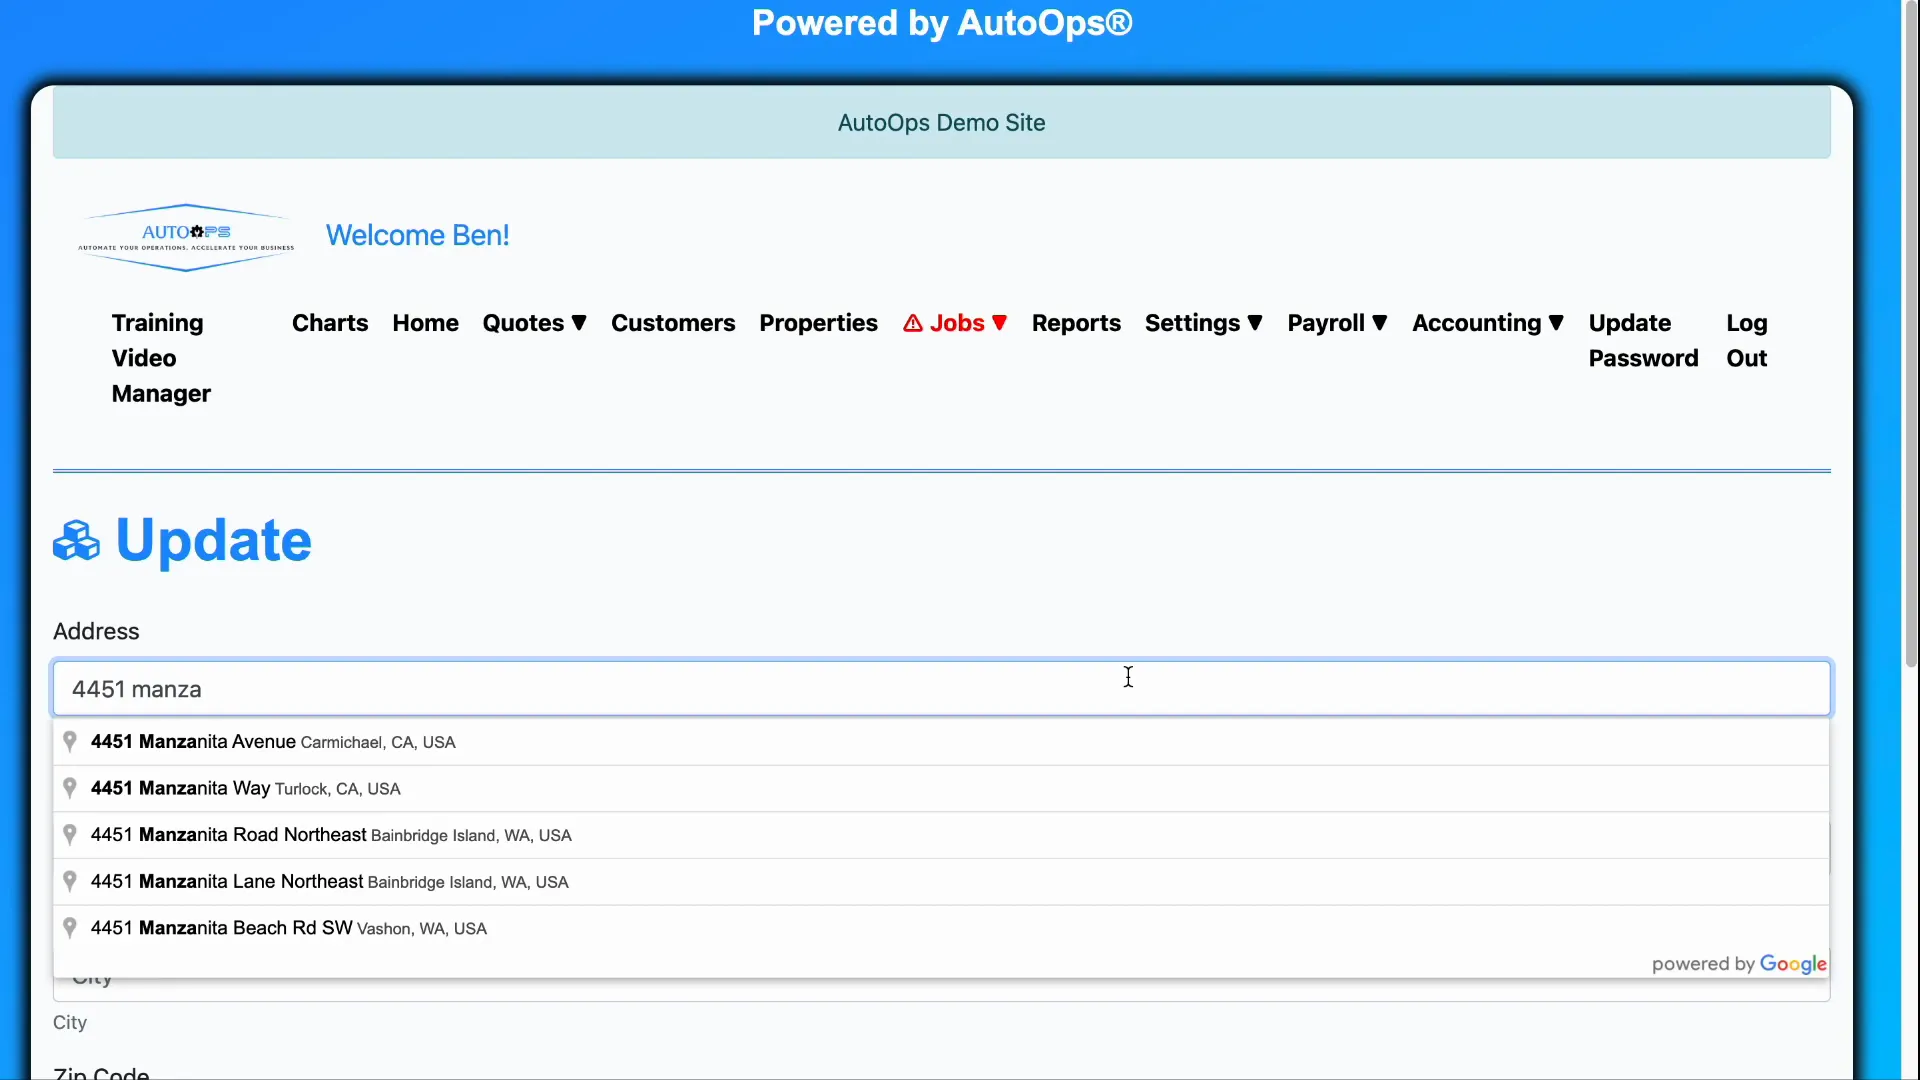
- Click the Create Job button (this is sometimes labeled as Job Invoice or Invoice).
- Type the service address into the address field. When the autocomplete suggestions appear, select the matching address to save time — the city and state will auto-fill.
- Click Save. If the address already exists in the system, the platform will detect the existing property in the background and link it automatically to this job.
- Complete any remaining job fields on the create job page (refer to your job field guide for details), then choose Save or Save and Dispatch. Review any job instructions presented before finalizing.
Tip: Selecting the address from autocomplete avoids creating a duplicate property and ensures historical service data remains attached to the job.
Quick checklist before saving a job
- Confirm the address matches the existing property record.
- Enter a clear job problem and select the correct job type.
- Verify any job instructions or property-level notes that appear.
- Choose Save or Save and Dispatch depending on whether you need to schedule/assign a technician immediately.
- Double-check contact and billing details if they differ from previous visits.
Common scenarios and tips
- If you can’t find the property in autocomplete, double-check the spelling or try a partial address (street name and number).
- Use the Properties page to start jobs when you need to reference property-specific notes or equipment lists during job creation.
- Use the Jobs page method when creating jobs in bulk or when you’re working from a schedule and not from a specific property view.
FAQ
Q: Will creating a job from the Jobs page create duplicate properties?
A: Not if you select the address from the autocomplete list. When the system recognizes an existing address, it links the new job to that property in the background. If you manually type an address that slightly differs, you risk creating a duplicate — use autocomplete whenever possible.
Q: What’s the difference between Save and Save and Dispatch?
A: Save simply creates the job record without assigning it to a technician or scheduling it. Save and Dispatch creates the job and opens scheduling/dispatch options so you can assign a technician and set an appointment immediately.
Q: Where do job instructions come from and why are they shown?
Job instructions are configured at the property, job type, or system level and are shown at job creation to remind the user of important steps, safety notes, or customer-specific information. Review them before saving the job.
Q: I selected the address from autocomplete but the wrong property linked — what should I do?
Cancel the job creation, clear the address field, and reselect the correct autocomplete match. If the issue persists, review the property list to confirm the correct address formatting or contact an administrator to merge or correct property records.
Q: Where can I find details about the fields on the create job page?
Refer to your job creation reference or internal documentation for field-by-field guidance. Key fields typically include job problem, job type, technician, schedule, line items, discounts, and notes.
Summary
Creating a job for an address that’s already been serviced is straightforward. Use the Properties page and Book Call when you’re already viewing a property, or use the Jobs > Create Job flow and rely on autocomplete to link to the existing property. In both cases, complete the job fields, review job instructions, and choose Save or Save and Dispatch to finish. These small steps help maintain clean data and preserve service history.